Experience gaming like never before by setting up your own dedicated game server. Don’t limit yourself to playing games as they are; take control and customize your gameplay by running your very own server. With many popular games offering this option, you have the opportunity to make your gaming experience truly personal.
Why Choose a Local Server over Remote Hosting?
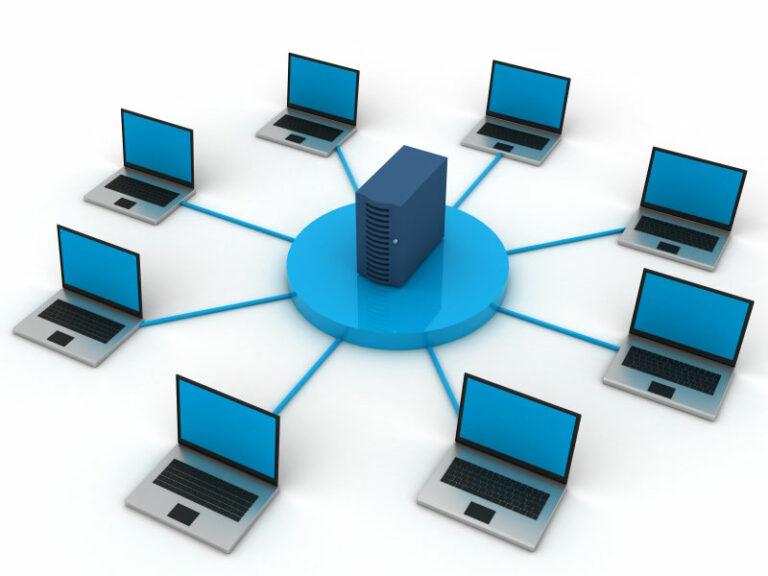
While remote hosting may seem convenient with features like dedicated support and reduced latency advantages, there are several compelling reasons to consider setting up your game server on your local network (LAN).
Remote hosting services can be unreliable, often delaying the update of server software for days after a game update is released. By hosting the server on your own machine, you have full control and can update it immediately. The cost involved is minimal, limited to the electricity required to run the system. You can repurpose the parts you replace during upgrades to build a new system solely for hosting a dedicated game server. Even if it’s older technology, most game servers don’t require high-end specifications.
Setting up a local server also allows you to have complete control over the server environment. You can modify game settings, install custom modifications (mods), and create unique gameplay experiences for yourself and your friends. It opens up a world of possibilities and enables you to unleash your creativity.
Benefits of Running Your Own Dedicated Server
A dedicated server provides a more stable gaming experience compared to relying on the game client itself. If any issues arise on your gaming machine, such as the need to close the game or reboot, players connected to your dedicated server can continue playing without interruptions. This ensures a smoother and more enjoyable gaming session for everyone involved.
Additionally, running your own dedicated server gives you full administrative control. You can manage player permissions, enforce rules, and easily monitor and moderate the game environment. This level of control allows you to create a safe and inclusive gaming space for your community.
Remote Management with VNC
For enhanced server administration, remote management tools are invaluable. One popular option is VNC (Virtual Network Computing). VNC allows you to remotely control your server from another device. This means you can manage and monitor your game server even if you’re not physically present in front of it.
Two widely used VNC programs are TeamViewer and Microsoft Remote Desktop Connection. These programs provide a user-friendly interface and secure remote access capabilities. With VNC, you can perform tasks such as software updates, configuration changes, and troubleshooting without needing to be physically present near the server.
Microsoft Remote Desktop Connection is a free software for modern Windows systems. It enables you to connect to another computer using login credentials, as if you were physically present. Microsoft has relaxed restrictions on un-activated copies of Windows 10, making RDC more accessible for remote management.
TeamViewer, on the other hand, is a cross-platform remote control software that allows you to access your server from various operating systems, including Windows, macOS, Linux, iOS, and Android. It offers secure connections and advanced features like file transfer and remote printing.
Using remote management tools like VNC not only simplifies server administration but also provides flexibility and convenience, allowing you to manage your game server from anywhere at any time.
Voice Chat Servers
Some multiplayer games don’t support private dedicated servers, but voice chat is often a crucial feature. Setting up a voice chat server for your guild, clan, or group is easy and requires minimal bandwidth. If you can stream on platforms like Twitch or video chat on Skype, your internet connection has more than enough capacity for hosting a voice chat server.
There are several voice chat server software options available, such as Mumble, TeamSpeak, and Discord. These software solutions provide a platform for real-time voice communication, allowing you and your fellow gamers to coordinate strategies, share information, and have fun together.
When setting up a voice chat server, consider the number of users and the quality of voice communication you desire. Allocate no more than 64Kb/s per connected user (e.g., 10 users require 640Kb/s upload speed). Ensure that your internet connection meets the requirements and configure the server settings according to your preferences.
Popular Games
Minecraft
To create a Minecraft server, visit the official site at minecraft.net/download and download the server software. Run the program from a new folder (e.g., D:\Minecraft Server\) to generate the necessary files and folders.
When you launch the server for the first time, it will create the following:
- eula.txt: End User License Agreement for the Minecraft server software.
- server.properties: Configuration file where you can customize various settings like server name, difficulty, and game mode.
- logs/: Folder containing log files that track server activity and events.
- world/: Default folder where the generated game world and player data are stored.
Before you can start the server, you need to accept the End User License Agreement by opening the eula.txt file and changing the “eula=false” line to “eula=true”. This step ensures that you comply with Mojang’s licensing terms.
Once you’ve accepted the EULA, you can start the server by running the server.jar file. You can connect to the server using your local IP address or by port forwarding to make your server accessible to players outside your local network.
Remember to configure server.properties to customize your Minecraft server experience further. You can adjust gameplay settings, enable plugins, and manage player permissions to create a unique and engaging gameplay environment.
Now, you’re ready to embark on your Minecraft adventure with your own dedicated server. Invite your friends, build amazing structures, and explore the limitless possibilities of Minecraft.
ARK: Survival Evolved
ARK: Survival Evolved is a popular open-world survival game that allows players to tame and ride dinosaurs and a ton more. To host an ARK server, follow these steps:
Step 1: Install the Game Server Software
First, you need to download and install the ARK Dedicated Server software from the official website.
Step 2: Configure Server Settings
After installing the server software, you’ll need to configure various server settings such as server name, map, player limit, and more. These settings can be modified in the server configuration files.
Step 3: Port Forwarding
In order to allow other players to connect to your server, you’ll need to set up port forwarding on your router. This ensures that the necessary ports are open and accessible to incoming connections.
Now youre ready for ARK adventures!
ARK: Survival Evolved plunges you into a mysterious world filled with ancient creatures. Gather resources, forge powerful weapons, and build impressive bases as you tame and ride dinosaurs. Team up with friends in multiplayer mode to conquer the challenges of this prehistoric survival adventure.
If you want dedicated game server hosting for ARK: Survival Evolved instead, then we can help you find the best game server hosting provider for ARK: Survival Evolved here.
Rust
Rust is a multiplayer survival game where players must scavenge for resources, build structures, and survive in a harsh environment. Here’s how to host a Rust server:
Step 1: Download the Server Files
Start by downloading the Rust Dedicated Server files from the official Rust website or through SteamCMD.
Step 2: Configure Server Settings
Next, you’ll need to configure the server settings, including server name, map, player limit, and other gameplay options. These settings can be adjusted in the server configuration files.
Step 3: Set Up Port Forwarding
To allow other players to connect to your Rust server, you’ll need to set up port forwarding on your router. This ensures that the necessary ports are open for incoming connections.
Ready to rumble?
Rust thrusts you into a harsh and unforgiving multiplayer world. Start with nothing but a rock and scavenge for resources to craft weapons, build shelters, and survive against the elements and hostile players. Form alliances, engage in intense PvP battles, and leave your mark on this brutal and ever-changing sandbox landscape.
If you want dedicated game server hosting for Rust instead, then we can help you find the best game server hosting provider for Rust here.
Terraria
Terraria is a sandbox adventure game where players explore, build, and fight in a 2D world. Here’s how to host a Terraria server:
Step 1: Obtain the Server Software
First, you’ll need to download the Terraria Server software from the official Terraria website or through SteamCMD.
Step 2: Configure Server Settings
Next, you’ll need to configure the server settings, including server name, world size, player limit, and other gameplay options. These settings can be adjusted in the server configuration files.
Step 3: Port Forwarding
Similar to other game servers, you’ll need to set up port forwarding on your router to allow other players to connect to your Terraria server.
Terraria the king of 2D
Terraria invites you to embark on a 2D sandbox adventure. Explore vast procedurally generated worlds, mine for valuable ores, craft weapons, and face off against challenging bosses. Build magnificent structures, uncover hidden treasures, and embark on thrilling journeys alone or with friends in this pixelated realm of endless possibilities.
If you want dedicated game server hosting for Terraria instead, then we can help you find the best game server hosting provider for Terraria here. Also, if you’re looking for mobile Terraria hosting, or free Terraria hosting you can read more about those as well!
Good luck with your game servers!


